
Read this book 30 years ago and it still has a special place on my book shelf. Now a Larry Elmore cover art inspired booknook will keep it company!

Build Process
The build involved sourcing, modifying and painting miniatures, making the foreground hill terrain, building the box, painting the backdrop, installing the lights, and creating the front image plate.
Miniatures
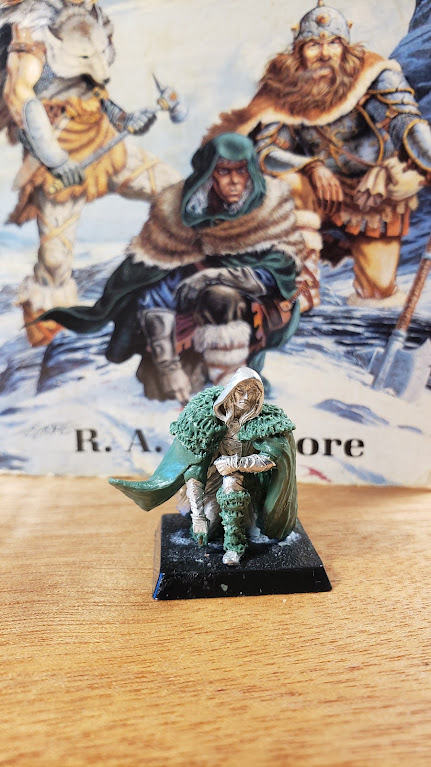
Drizzt
The source of the Drizzt miniature is Dark Sword Miniatures.

From there there is a significant amount of surgery to achieve the pose from the book cover.

With a jewelry saw, cut away the base, the legs at the knees, and the right shoulder area. And also separate the hands from the weapons (I used a pair of wire cutters for this as the metal is soft)

Then confirm your new pose with sticky tack. Looking good so far!


Then progressively get better at adding fine details.
Prime and paint

not bad!
Wulfgar
I used this miniature from Reaper Miniatures (Human Barbarian Hero) as the base model.

Then I kitbashed a likeness of Aegis Fang starting with a GW chaos warrior hammer. It probably would have been easier to design it in TinkerCAD and have my neighbor print it, but this was done days before I learned about it.


Nope

better

A bit long, but I like it!
Bruenor
For Bruenor I used a fairly standard GW Dwarf Warrior from the Out of Print (OOP) box with sprues stamped as 2004.

The kit does not come with an empty hand, so this one had an ax trimmed off and I sculpted the thumb. I also mounted a shield on his back because he uses one in the book and it would otherwise cover much of his face.

Terrain
The terrain is small snow and rock covered hill on which the miniatures will be arranged. To form the hill I stacked several slices of dollar store (Readi-board) foam core. It is important to frequently test-fit the miniatures as shown below.


Finally I set in Drizzt then flocked the base by carefully brushing on PVA glue and applying Woodland Scenics Flake Snow.

Box & Backdrop
The box is formed from dollar store foam core and the left side is typically left open so that the background can be more easily constructed and painted.


The background was painted with craft paint (white, gray, very small bit of blue) on a flexible sheet of "paper" for a cricut machine. We had this scrap lying around from some kind of project my son did and it has the feel of a very thin flexible plastic sheet. I imagine photo paper will work very well here also.


The outer shell is constructed from thin sheets of basswood. I use wood glue to affix the wood to the foam core and will gently stack a few books or clamp it while drying. I mounting the top piece first, then the sides and I try not to worry too much about the precision of the fit on the bottom. The pieces are all over-sized (except the bottom) and I use a small orbital sander to quickly make everything flush. If you were to measure really well, you could easily sand it flush by hand instead.

Lights & Electrical
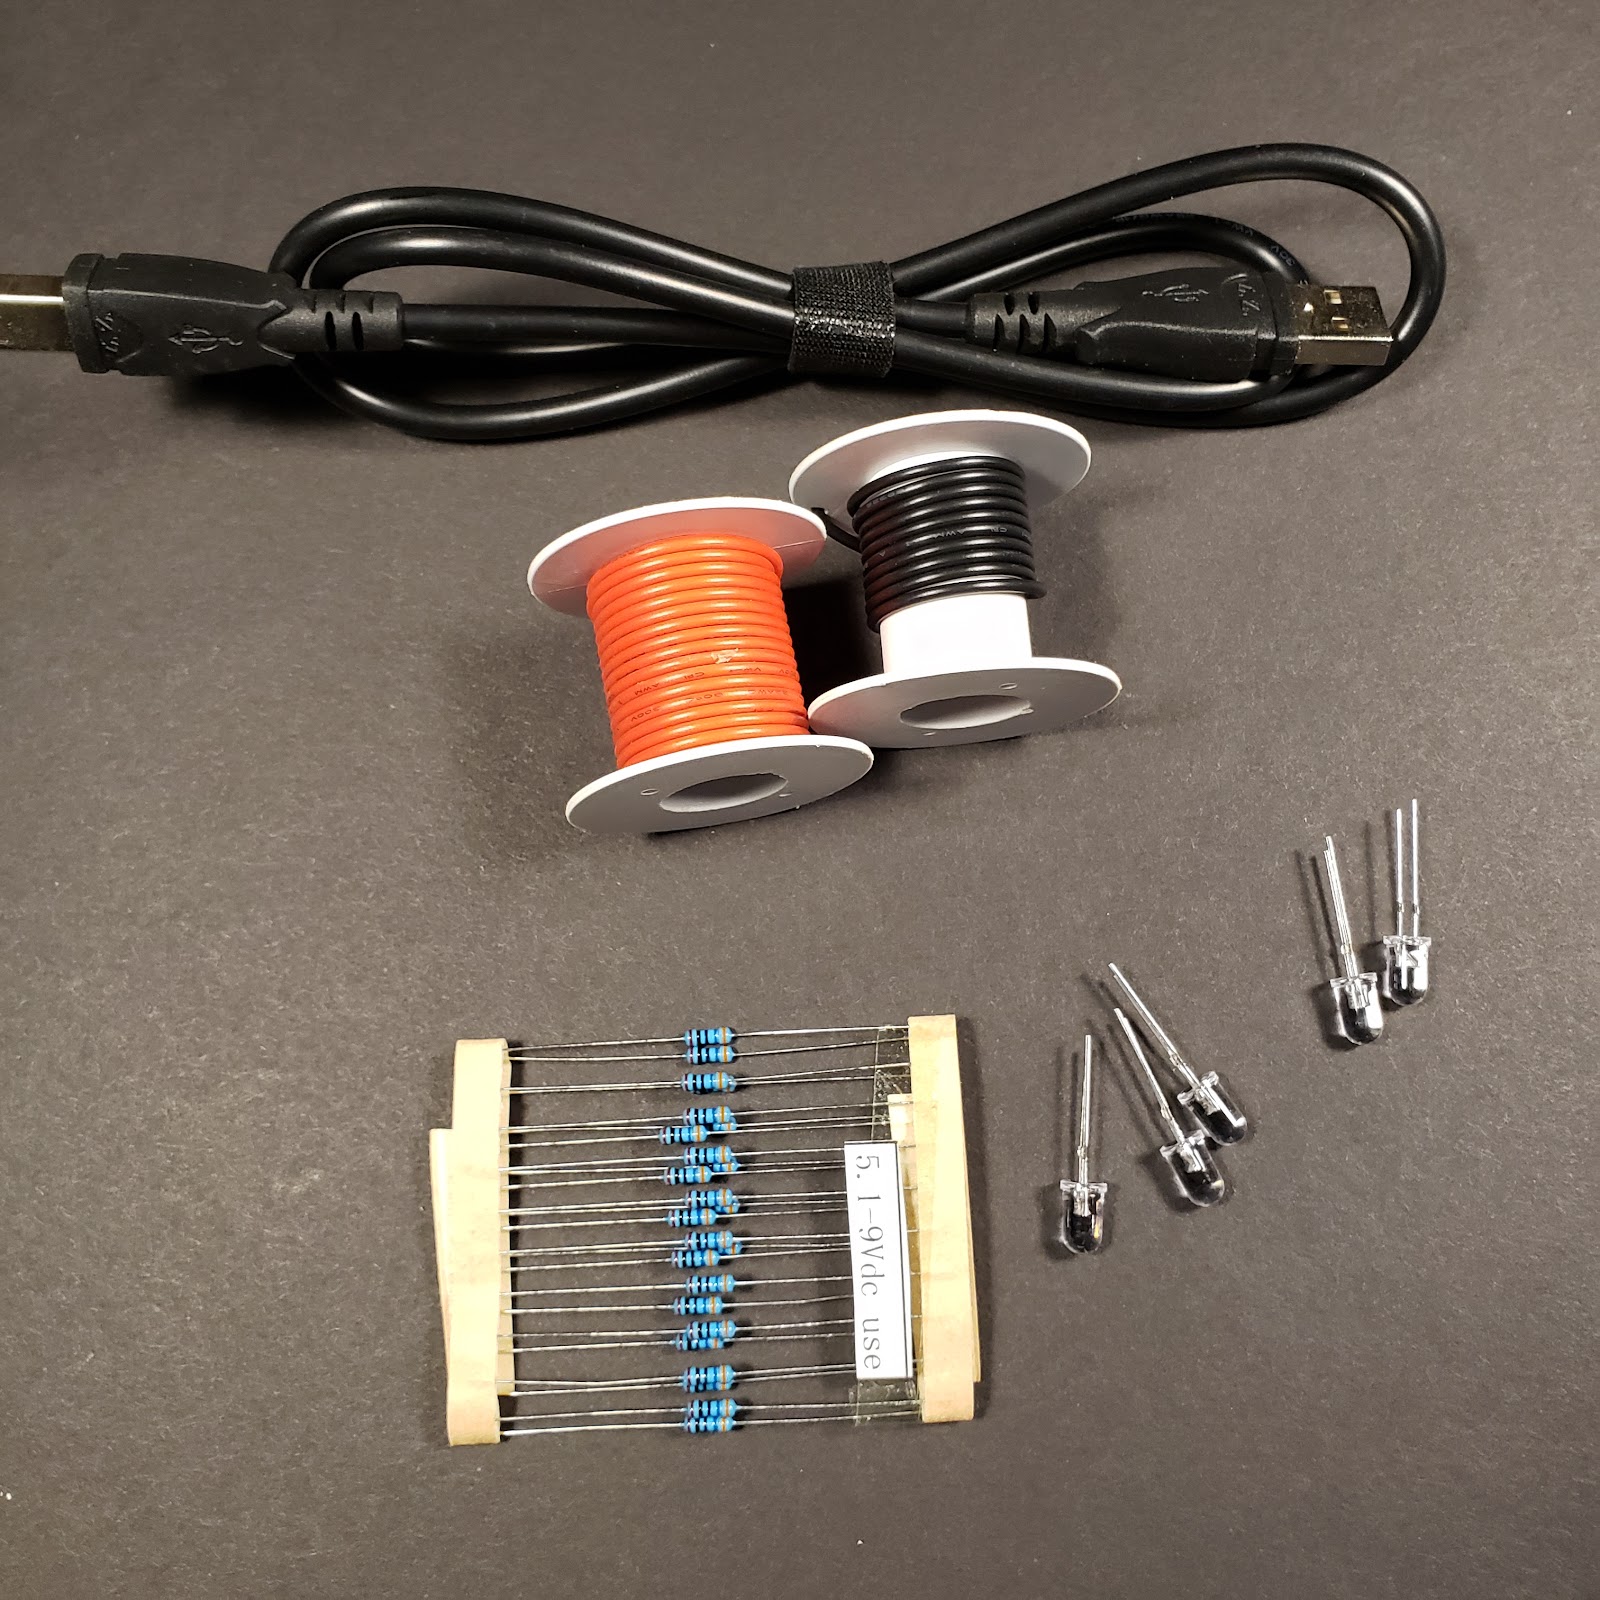
For this part of the project I use standard white 3v LEDs with the intent of running the nook via a USB power supply. I bought a bunch of cheap USB cables, but I'm usually able to find an older type of cable which I have several copies of and no use for so I cut off the odd end and use it.
Since USB is 5v and the LEDs are intended for 3V, you will need to use resistors I have a bunch of 360 Ohm resistors for exactly this purpose. Because we will use 5 LEDs, you could combine the resistors (using only one larger resistor) and attach all of the LEDs across the same voltage drop (less soldering), however I stopped doing this because I found the variability of the LEDs means that one of them can carry more of the load, weakening it, until the next needs to take the load, and so on... Until after a few months your LEDs look dim and are warm to the touch. So I connect individual resistors directly to each LED.
I mounted four LEDs in the top of the box. The LEDs behave like little spot lights, so I glued parchment paper over top to diffuse the light.

Being lit from the top puts the figures in shadow. To resolve this I added a single light on the left side. I cut away a small piece of the foam core side and mounted the LED. To complete the effect, I added parchment paper to diffuse the light and aluminum foil as a light shield so that it does not glow through the box or the front plate we will be adding.

Lastly, the USB plug is soldered on to the back.

Front Plate
The front plate was done in Inkscape (svg or pdf) using my standard Paperback book box size frame, a gradient and images for the logos. The Forgotten Realm logo can be readily found. But for the Crystal Shard text I grabbed the highest resolution cover image I could find and used Gimp's select by color feature to pull the crackled title letters. Then I found a best match serif font for the "RA Salvator."

Unfortunately my printer interpreted these grays as being quite blue. But it still looks great.
No comments:
Post a Comment